
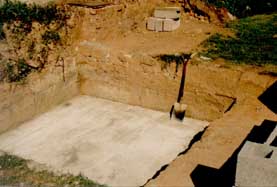
 Once the base concrete has been poured and allowed to cure for a few days, layout the concrete blocks to the pond dimensions, making sure that they are positioned centrally on the pond base. When you have done this and are satisfied with the layout, mark the exact position of the corner block. You can now mix some mortar and lay this block. Take your time and ensure everything is square and level, as this is critical. Get it wrong here and you will have bigger problems as you progress with blocklaying. At this stage DO NOT fill the hollow areas of the blocks. This will be done when you have laid to the total height needed.
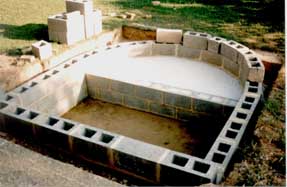
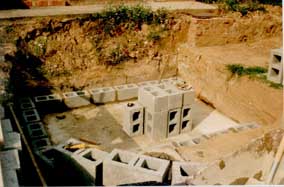 In this view TWO layers of blocks have been mortared in position (the square part of the pond) and a dry run positioned round the curve to see how they will fit.
 When I was happy with the fit, I mortared the blocks round the curve to the same height as the front wall and then poured concrete up to the block level
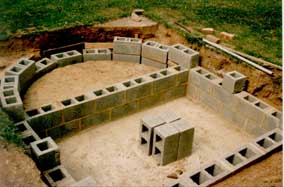
 This took the block level to TWO BLOCKS high all round the pond, and with a step down to the deep part. I then laid blocks dry to the next level to check how they would fit around the curve. When I was happy, these blocks were removed and mortared into place as shown in this photograph.
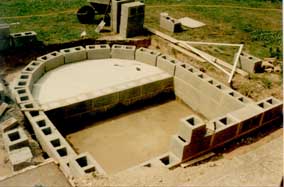
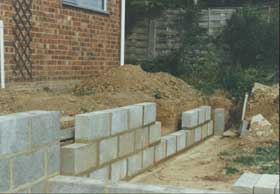
 In this photograph, you can see I have laid one of the concrete blocks on its side. Before I did this I filled the hollow area of the block immediately underneath it. This provides added strength to the structure. Only fill the hollow areas when you are at the TOP height of your wall. Although I was building higher in this position, as can be seen in the following photograph, I had to fill the hollow area now as the block capped the underneath blocks.
 In this view, the retaining wall of the patio/filtration unit can be seen with the sideways on concrete block in place. One of the two hollow areas will be used for a 100mm pipe to exit from the pond to the filtration unit in a later part of the construction.
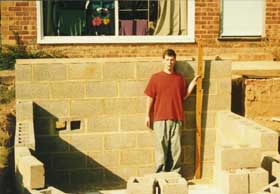 This photograph clearly shows the height of the backwall, which is only about two metres from the patio door. Hence the reason for using 215mm hollow concrete blocks for the construction of the pond. Whilst I could probably have reduced the size on the sides, I decided to stick to the same size block for added rigidity. Once the pond walls had been finished and given time to cure, I filled all the hollow areas of the concrete blocks, making sure that the concrete was pushed right down to the bottom block. It is surprising how much concrete is used just filling in the hollows.
Before you can start rendering you must have all your pipework installed. Whilst the gravity side had been taken care of early on in the construction, the return pipework had to be drilled at the last minute. For drilling concrete blocks you need a diamond core drillbit plus a very Heavy Duty Hammer Drill. Even if you have a domestic Hammer Drill don't use it - it will get burnt out very quickly. Hire shops will hire you the drill, drillbit and safety transformer quite cheaply for the day. When drilling, always wear safety goggles.
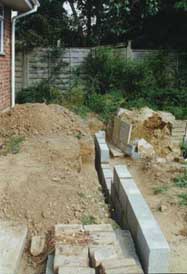 At this point, I started building the rest of the retainer wall for the raised patio. As this was much lower in height, I used 140mm solid concrete blocks as can be seen in this photograph. The start of the steps formation can be seen in these views. This will lead down to a lower patio area.